You are here: Courses > Adding Courses with the WYSIWYG Course Editor

Adding Courses with the WYSIWYG Course Editor

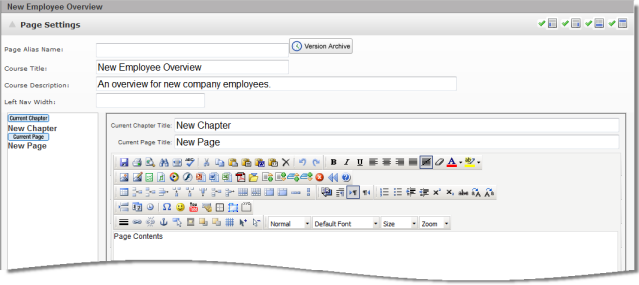
The LearnCenter WYSIWYG (What You See is What you Get) Course Editor, is a web-based authoring tool available inside your LearnCenter. It allows you to create multimedia web-based content right inside your LearnCenter. This editor is very similar to the Site Editor and Page Editor used to design the main site header and the LearnCenter Pages.

Some HTML customizations, such as height and width settings, may negatively impact on-screen viewing. Always test and validate any custom HTML code to ensure that it displays as you intended.

On the ControlPanel:

  1. Click   on the Courses menu to expand it.
  2. Click Add New Course.

  1. Type the Name of the Course. This will display in the catalog.
  2. Type a Description for the Course. This will display in the catalog. (4000 characters maximum)

  1. Click the Allow Reviews check box if you want to enable Users to submit reviews for this Course.
    or
    Clear the check box if you do not want to enable Users to submit reviews for the Course.
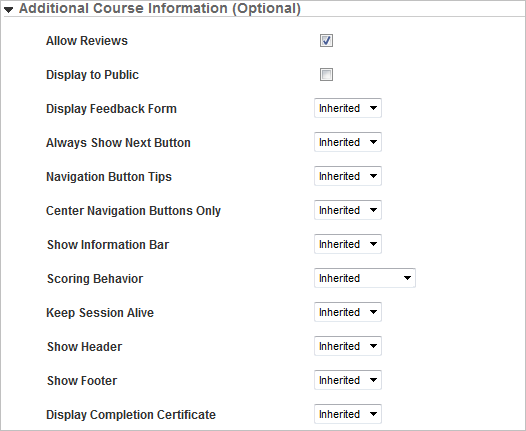
The Allow Reviews check box only displays if the Ratings and Reviews feature is active for this LearnCenter. See Ratings and Reviews for information about this feature.
  1. Select the Display to Public check box if you want the Course to appear on the public Course lists.
    or
    Clear the check box if you do not want the Course to appear on the public Course lists.
  2. Select one of the following from the Display Feedback Form drop-down list. Use this field if you want to override the default setting in General Course Options.
  1. Select one of the following from the Always Show Next Button drop-down list. Use this field if you want to override the default setting in General Course Options. The Next button is used to move through all pages within the Course, move to the next Course, or exit out of a Course.
  1. Select one of the following from the Allow Exit on Next drop-down list. Use this field if you want to override the default setting in General Course Options. The Allow Exit on Next option works in conjunction with the Always Show Next Button. This option is not applicable if the Always Show Next Button is not enabled, the User is not experiencing a class session or if there is no Course that is next after a class session.
  1. Select one of the following from the Navigation Button Tips drop-down list. This field only displays if you are using the Course Player Classic view. Use this field if you want to override the default setting in General Course Options.
  1. Select one of the following from the Center Navigation Buttons Only drop-down list. Use this field if you want to override the default setting in General Course Options.
  1. Select one of the following from the Show Information Bar drop-down list. Use this field if you want to override the default setting in General Course Options.
  1. Select one of the following from the Scoring Behavior drop-down list. Use this field if you want to override the default setting in General Course Options.
  1. Select one of the following from the Keep Session Alive drop-down list. Use this field if you want to override the default setting in General Course Options.
  1. Select one of the following from the Show Header drop-down list. Use this field if you want to override the default setting in General Course Options.
  1. Select on of the following from the Show Footer drop-down list. The footer can only be disabled if you are using Course player classic view. See Optional Footer and Header for Courses for additional information. Use this field if you want to override the default setting in General Course Options.
  1. Select one of the following from the Display Completion Certificate drop-down list. Use this field if you want to override the default setting in General Course Options.

The Inherited option only displays in a sub LearnCenter. The Inherited/Default (No) option only displays in the root LearnCenter. The Inherited hierarchy setting functions as follows:

  1. If the Course/Class has this setting specified, it uses the specified setting. If it is not specified, it checks the sub LearnCenter setting.
  2. If the sub LearnCenter has this setting specified, it uses the specified setting. If it is not specified, it checks the parent LearnCenter setting.
  3. If the parent LearnCenter has this setting specified, it uses the specified setting. If it is not specified, it checks the setting of the root LearnCenter.
  4. If the root LearnCenter has this setting specified, it uses the specified setting. If it is not specified, it uses the Inherited/Default (No) setting.

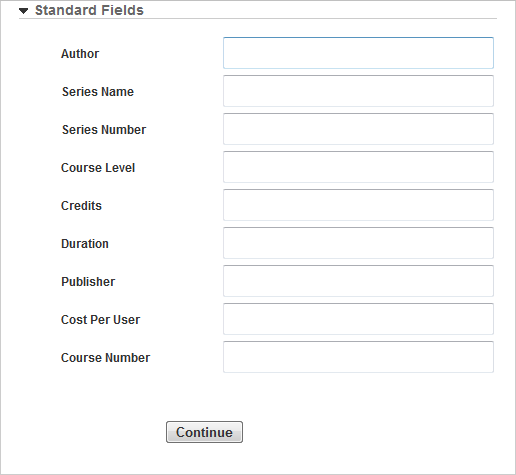
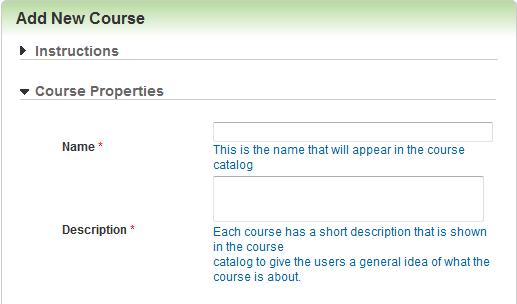
The following fields are optional.

  1. Type the Author.
  2. Type the Series Name.
  3. Type the Series Number.
  4. Type the Course Level.
  5. Type the number of Credits (maximum 3 digits).
  6. Type the Duration of the Course (maximum 4 digits).
  7. Type the name of the Publisher.
  8. Type the Cost Per User (maximum 6 digits, no decimal).
  9. Type the Course Number.

If your LearnCenter has the WBT expiration features enabled, the Expiration Options section displays so you can override the attempt and completion expiration defaults for this Course.

  1. Select the Expire Attempts check box if you want to Override LearnCenter Default. The Expiration Options section expands.
  2. Select the type of expiration for attempts you want to apply to this event:
  1. Select the Expire Completions check box if you want to Override LearnCenter Default. The Expiration Options section expands.
  2. Select the type of expiration for completions you want to apply to this event:

If you have custom fields, type the appropriate information for them, or select the Populate Default Value check box to have LearnCenter fill in the fields automatically with default information.

  1. Click Continue. A new page displays. At this point the Course properties have been saved and a blank chapter and first page have been created.

  1. Read the instructions and then click Start Modifying Your Course. A new window opens and you can begin writing your Course.

  1. Select the Unpublish item check box to indicate that you want the new Course to be unpublished while you work on it. (Default)
    or
    Clear the check box if you want to publish the Course immediately.
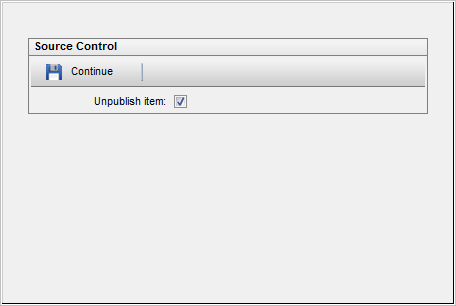
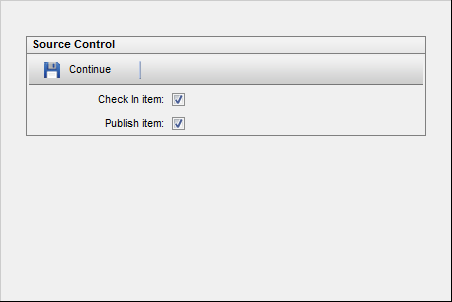
This window only displays if you have activated the Learning Object Manager version control feature for your LearnCenter. If this feature is not currently available in your LearnCenter, the Course is considered checked in and published.
  1. Click Continue. The  Course Editor opens.

  1. In the Page Settings section, type an optional Page Alias Name. You can use this to refer to the page in a link.
  2. The Course Title reflects the information you entered for that field on the Add New Course page. You can change this here if necessary.
  3. The Course Description reflects the information you entered for that field on the Add New Course page. You can change this if necessary.
  4. If your Course will display a left navigation bar for Users, enter the Left Nav Width in number of pixels.
  5. Type a Current Chapter Title. This title will display for all subsequent pages until you change it to start a new chapter.
  6. Type a Current Page Title.
  7. Click any of the Show Navigation buttons to enable or disable display of Left, Right, Bottom, and Top Navigation:
Show Left Nav - displays the Course navigation menu on the left.
Show Right Nav - displays the Notes, Search, and Dictionary Nav Bar on the right.
Show Bottom Nav - displays the Exit, Modify (if you author/admin), and Next buttons at the bottom of the page.
Show Top Nav - displays the Exit, Modify (if you author/admin), and Next buttons at the top of the page.
  1. In the white text area, create and design the page contents using the LearnCenter Courses WYSIWYG Editor.

Tips: Use Insert a New Page Before This Page Insert a New Chapter Before this Page Insert a New Chapter After This Page to add pages and chapters before or after the current page. Changes to each page are saved automatically. The organization of the chapters and pages you create display in the left column, and you can jump to a chapter or page by clicking beside it. Use the buttons labeled Photo, Test, Audio, Video, Adobe® Flash®, Microsoft® PowerPoint®, Microsoft® Word, Microsoft® Excel, PDF, Import, and Resource Manager to add those elements to the page.

The WYSIWYG Course Editor accepts Unicode characters.

To get a total character count, switch to the HTML view and copy all the text and HTML code from the WYSIWYG Course Editor and paste it into a text file, then use any program that provides character counts to see the current quantity. Shareware programs like TextWiz can be used to count characters.

  1. Click Save Changes when you have finished creating your Course.
The Course it is saved in the LearnCenter “Warehouse” until you are ready to publish it. You may need to open and modify it several times before you are ready to publish the Course. To make modifications, you must first bring your Course out of the Warehouse and insert it to the LearnCenter. Then you can view the Course and modify it.
  1. A preview window opens and you can preview your Course. If you have activated the Learning Object Manager version control feature for your LearnCenter, the following window opens when you have finished previewing.

  1. Select the Check In item check box to check the Course into Source Control. (Default)
    or
    Clear the check box to leave the Course as checked out.
  2. Select the Publish item check box to publish the Course. (Default)
    or
    Clear the check box to not publish the Course at this time.
  3. Click Continue.

Related Topics IconRelated Topics


Copyright © 2010-2015, Oracle and/or its affiliates. All rights reserved.